In this article, we’ll illustrate the steps involved in utilizing servers as deployment targets within Cycleops. The main focus in this process is host registration, which involves registering your server with Cycleops. The host is an essential component of a setup, and gaining SSH access is necessary for registering your servers with Cycleops.
By the end of this article, you’ll have learned how to register a host — which will be used in the deployment tasks related to a setup. Let’s begin!
What is host registration, and why should you use it?
Since one of the main reasons for using Cycleops is to deploy your code to your own servers, it is important to ensure that all executed instructions are directed toward those servers. To grant Cycleops access to your servers, first, you need to provide SSH access and valid credentials to authenticate with the server’s operating system. In the background, Cycleops utilizes Ansible playbooks to deliver instructions to your servers, based on the configurations you created to represent your application code software stack.
In Cycleops, the term “host registration” refers to the process of installing a unique and predefined SSH key to your server’s SSH “authorized_keys”, specifically for the user “cycleops”. Once the process of connecting your server is completed, it will appear with the status “Registered” (we’ll talk about Cycleops statuses further below). It’s important to note here that only hosts with a “Registered” status can be used to run deployment jobs.
Registering your Hosts in Cycleops
Without further ado, let’s have a look at how you can register your hosts in Cycleops.
Register from inside the server or from Cycleops User Interface (UI)
Connecting your server with Cycleops is a straightforward process, as the built-in automation engine performs all the necessary steps for you. All you need to do is provide access to your server.
Now, you have two alternatives for host registration. The first one involves copying and executing a single command in the server’s console. The second, requires filling out a form and providing the SSH credentials.
Read more about them below, to see which scenario best suits your needs.
1. Use the command line on your server
To add a new host to your Cycleops account, navigate to the Inventory item located in the main menu on the left sidebar of your account. Click on the “Add host” button, and you’ll be immediately redirected to the “Create new host” page. There, you’ll find two options displayed at the top of the page. For this scenario, go for the long command option — which is particularly created for your account — and click on the “copy the command” button.
After copying and pasting the command into your server’s console, you’ll receive a host registration confirmation response from Cycleops. You can check the outcome on the user interface by navigating back to the host list and verifying the host status.
Well done! You’ve successfully added a new host to your Cycleops account! No further steps are required.
2. Connect via the Web UI
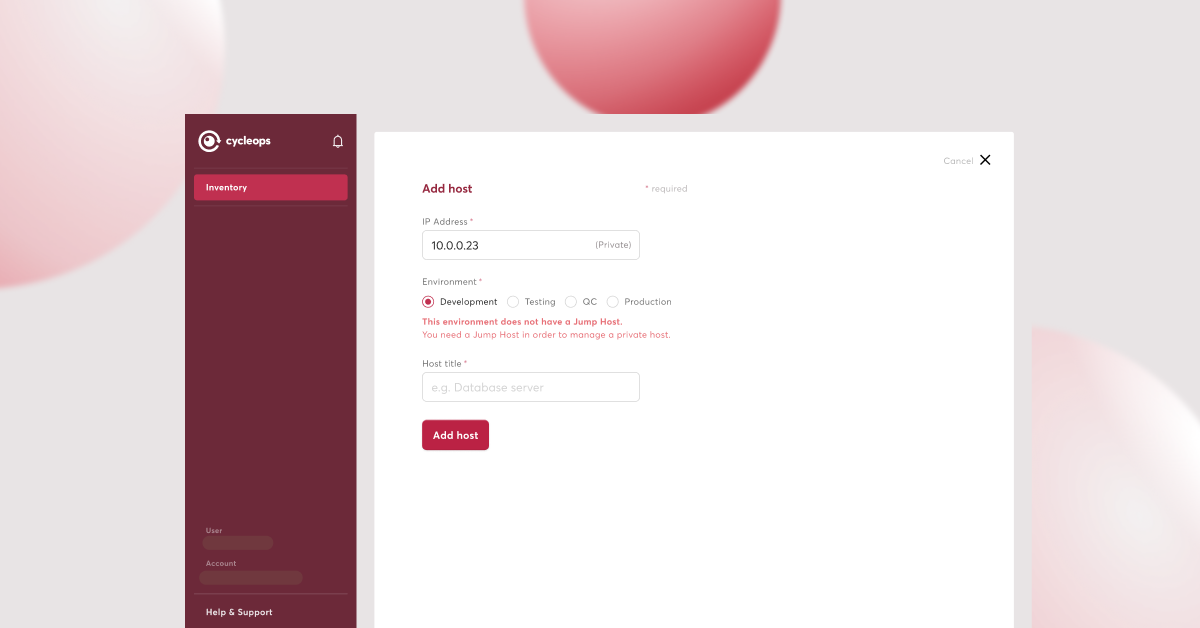
Alternatively, you can add a new host to your Cycleops account by filling in a form. To do this, follow the steps outlined above, but when you get to the “Create new host” page, choose the option “fill in the form”; that is, instead of copying and executing the command.
This form contains several fields that you have to complete. Specifically:
- IP Address: This is the public IP address of your server, which must be accessible to Cycleops.
- Host Name: This is the name you want to use for your server
- Jump Host: Select this option if you want to make your host a bastion (jump) host.
- Environment: Choose the environment that your host belongs to.
- Register Host: Here, you can either select to fill in the SSH credentials (username and password) or the username and SSH key option.
In case you choose the SSH key option, in the “Register Host” field, make sure that you have already created an SSH key for it. You can do this in the “SSH keys” menu item located under your account’s name, in the main menu. Once you have filled in all the details, hit the “Create” button, and wait for a few minutes for Cycleops to connect to your server, and perform the necessary tasks.
Registration status on the UI
After connecting your server with Cycleops, your server will be in one of the following three states: Unregistered, Registered, or Failed. Let’s take a closer look at each of these states.
- Unregistered: The host registration process has not yet started.
- Registered: You have successfully registered your host.
- Failed: There were errors during the registration process.
On the page showing the details of your host, you can see if the host is in a “Registered” or “Failed” status. You can view the output of the automation job by clicking the status name. If the registration failed, you can see here any errors or other issues that occurred during registration.
What is a “jump host”, and how can you use this function for your private servers?
As mentioned previously, in Cycleops you have the option to designate one of your hosts as a jump host. This allows you to register the rest of your hosts without providing public network access to them. You can use the jump host as an intermediary to your servers that reside on a private network. Only the jump host remains publicly accessible, which can be convenient in situations where you don’t want all of your servers to be publicly exposed.
To use the jump host function in Cycleops, simply register a host and mark it as a “jump host” during the registration process. In this way, Cycleops will use the jump host server to communicate with private IP addresses in your network.
Some common SSH connectivity issues to consider
As you probably already know, SSH (Secure Shell) is a widely used network protocol for secure remote access and control of computers and servers. While SSH is a reliable and secure way to connect to a remote system, there are some common connectivity issues that users may encounter. Understanding and resolving these issues will help you ensure a smooth and secure SSH connection.
1. Ensure proper IP routing and firewall configuration for public SSH service
To ensure the successful routing of network traffic to the subject server, use the correct IP address. You also want to ensure that there are no firewalls blocking access to the SSH port on your server. For instance, these firewalls may be from:
- local iptables rules,
- security groups associated with your cloud instance, or
- other network devices or rules in your environment.
2. Utilize a dedicated server instead of a personal computer
If you just want to test the Cycleops service, make sure to use a dedicated server and not a machine that might reside behind your home network router. This would require a special configuration to redirect internet traffic, which it’s outside the scope of this guideline.
3. Use valid IP addresses instead of localhost
Using localhost IP addresses, like 127.0.0.1 and other IP addresses reserved for network operations, will not accomplish the desired results. It’s important to use valid IP addresses for successful implementation.
That was it! Hopefully, this guide will provide you with all the information you need to successfully register your hosts in Cycleops. By following the steps outlined, you can ensure a smooth host registration process, and get the most out of your Cycleops experience!